


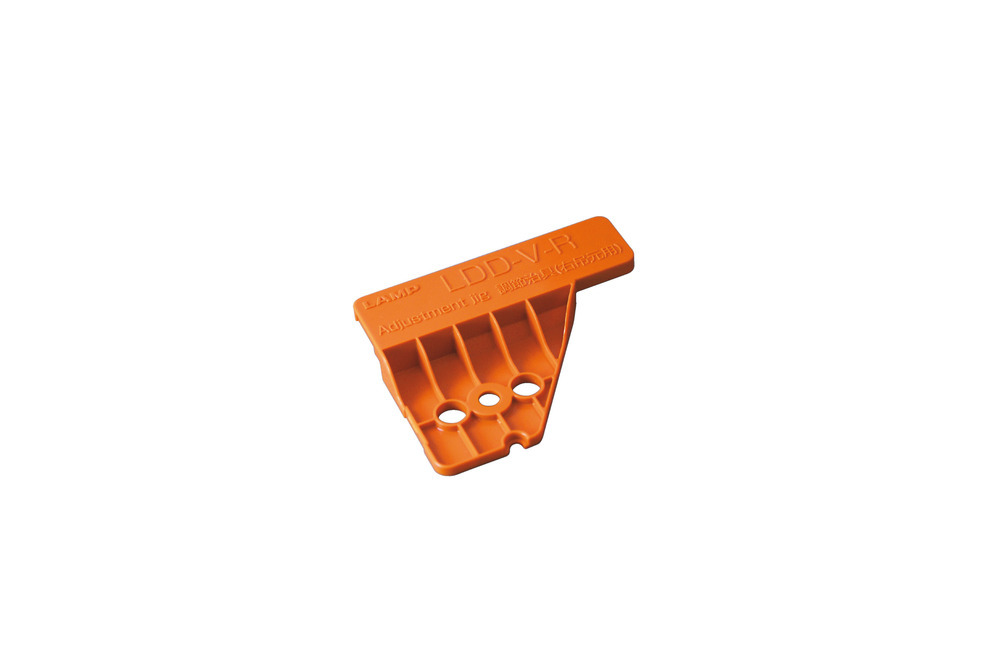
- LDD-V-JIG
ADJUSTMENT JIG FOR COUNTER PLATE OF LDD-VLDD-V-JIG
2 / 2 total results

invsible damper,hidden damper,invisible door hinge,invisible door,hidden damper

invsible damper,hidden damper,invisible door hinge,invisible door,hidden damper
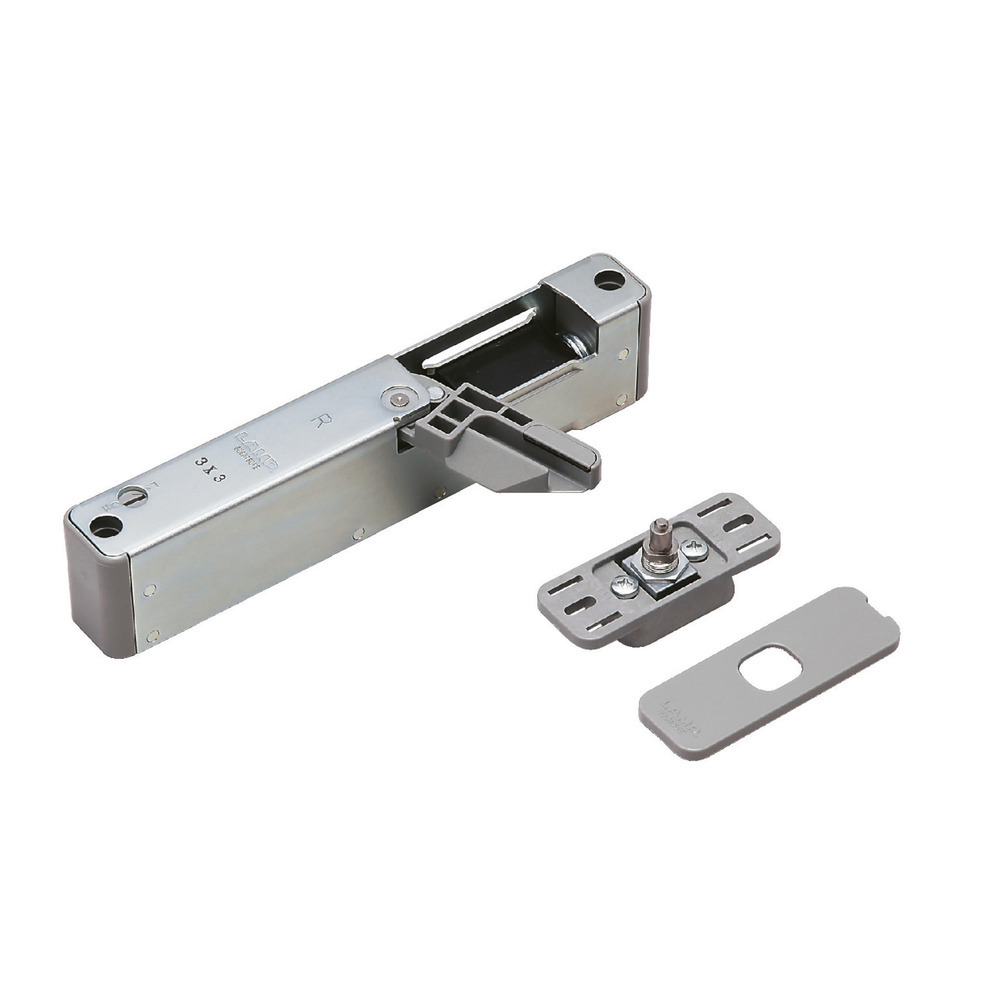
- Easy to adjust position of counter plate.
Drawings / Illustrations
-
 Show All
[How to Use]
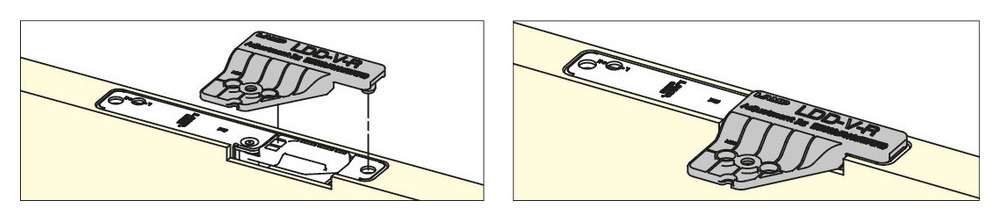
—1. Install the adjustment jig
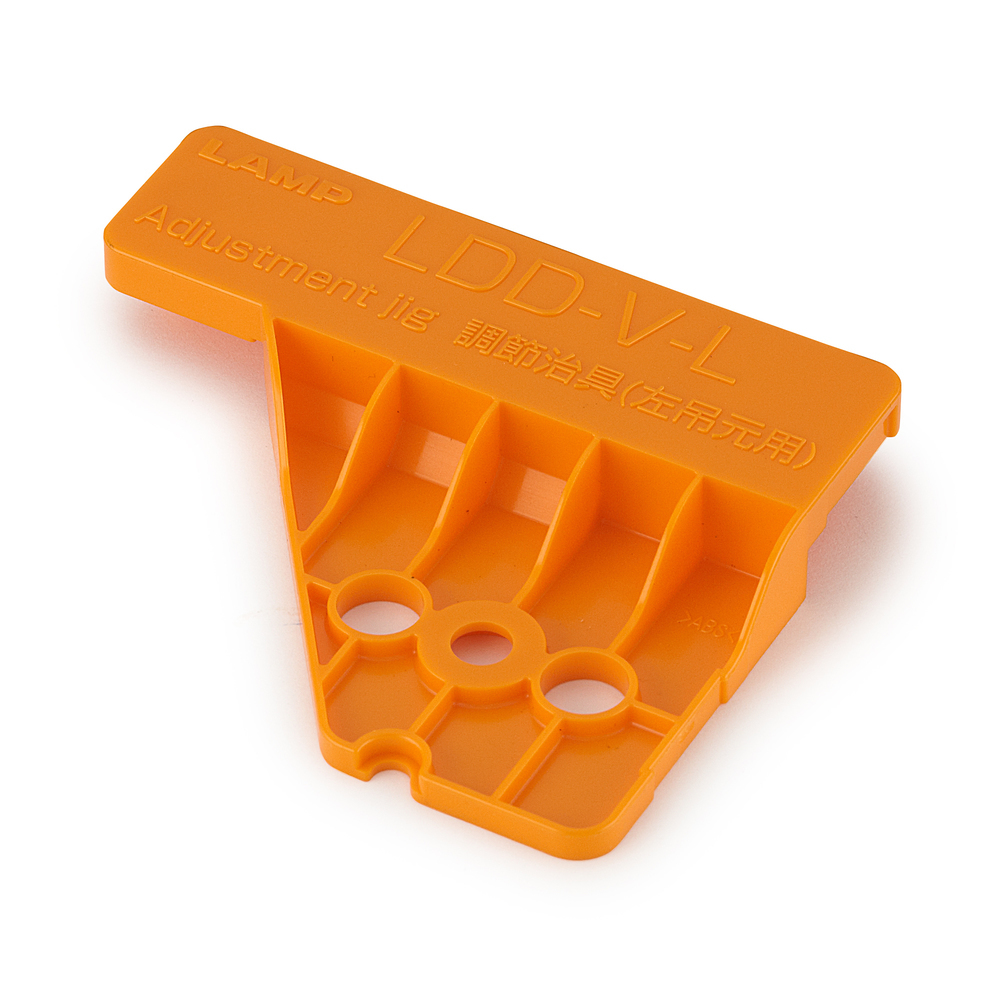
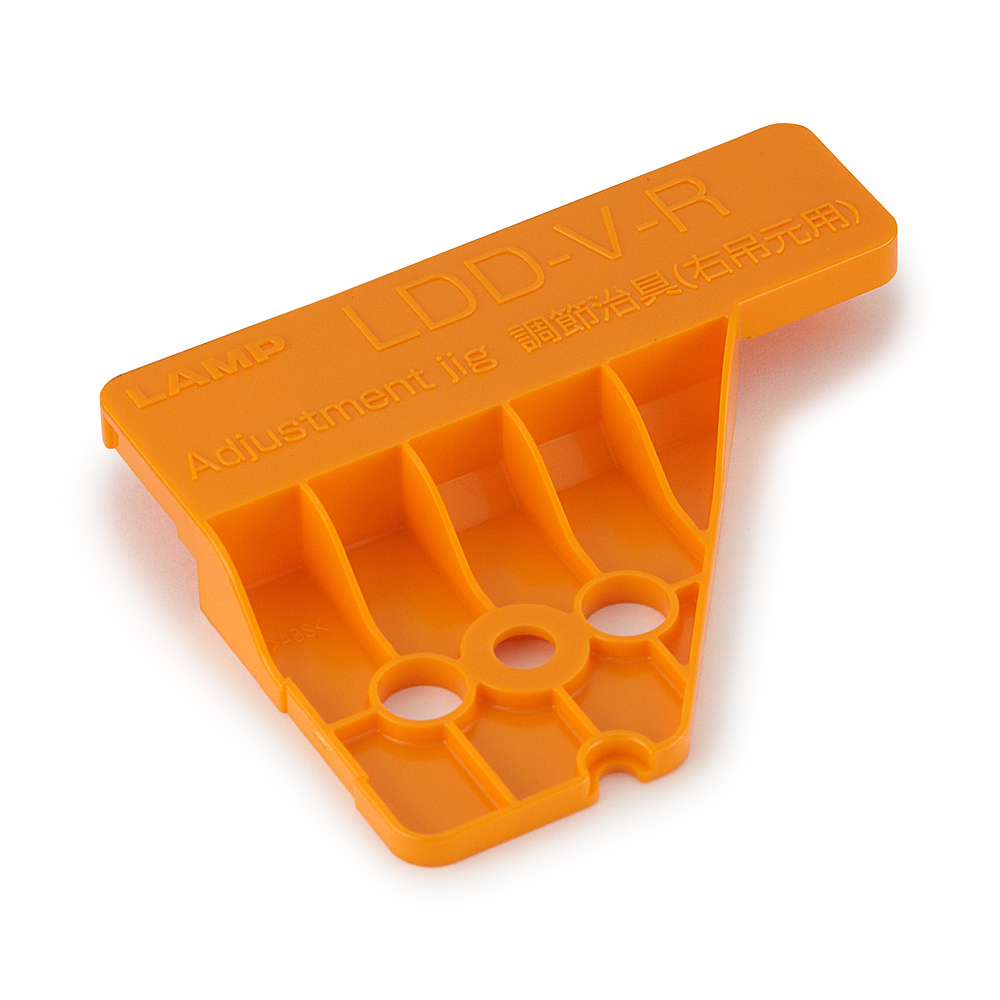
①Fit the adjustment jig firmly into the body.
*Right-handed and left-handed available.
*Be sure to adjust the counter plate position after adjusting the installation position of the hinges. -
Show All
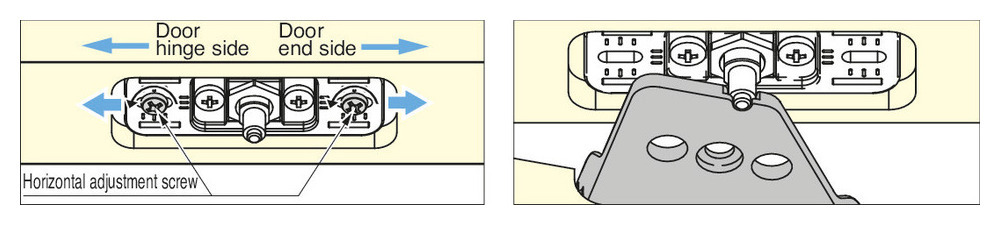
—2. Horizontally adjust the counter plate
①Loosen the horizontal adjustment screws.
②While holding the adjustment jig by hand, slowly close the door and align the counter plate shaft with the groove.
③Tighten the horizontal adjustment screws. -
Show All
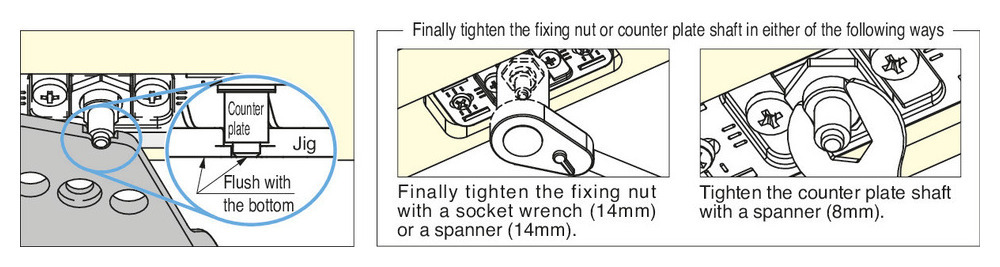
—3. Vertically adjust the counter plate
①Loosen the fixing nut.
②While holding the adjustment jig by hand, slowly close the door and align the top of counter plate shaft with the bottom of jig.
③Tighten the fixing nut or the counter plate shaft firmly. -
Show All
—4. Check
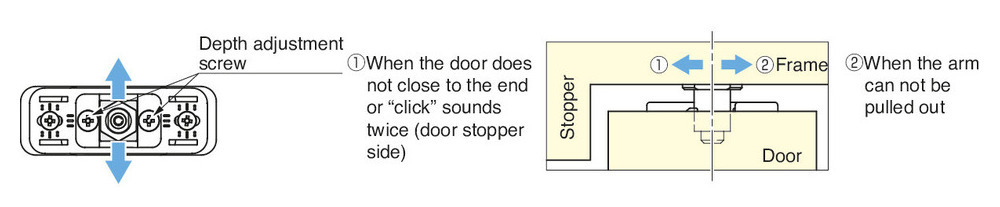
①When removing the jig and closing the door slowly to the end, “click” sounds once.
*If the door does not close to the end or “click” sounds twice, perform depth adjustment.
②When opening the door, “click” sounds once, and the arm is pulled out.
*If the arm can not be pulled out, perform depth adjustment.
③Check if the clearance between the arm and the counter plate shaft is appropriate. -
Show All
*Depth adjustment of the counter plate (adjustment jig LDD-V-JIG can not be used for depth adjustment).
①Loosen the depth adjustment screws.
②Align the centre of the counter plate shaft with that of the door thickness.
③Tighten the depth adjustment screws.

-
[How to Use]
—1. Install the adjustment jig
①Fit the adjustment jig firmly into the body.
*Right-handed and left-handed available.
*Be sure to adjust the counter plate position after adjusting the installation position of the hinges. -
—2. Horizontally adjust the counter plate
①Loosen the horizontal adjustment screws.
②While holding the adjustment jig by hand, slowly close the door and align the counter plate shaft with the groove.
③Tighten the horizontal adjustment screws. -
—3. Vertically adjust the counter plate
①Loosen the fixing nut.
②While holding the adjustment jig by hand, slowly close the door and align the top of counter plate shaft with the bottom of jig.
③Tighten the fixing nut or the counter plate shaft firmly. -
—4. Check
①When removing the jig and closing the door slowly to the end, “click” sounds once.
*If the door does not close to the end or “click” sounds twice, perform depth adjustment.
②When opening the door, “click” sounds once, and the arm is pulled out.
*If the arm can not be pulled out, perform depth adjustment.
③Check if the clearance between the arm and the counter plate shaft is appropriate. -
*Depth adjustment of the counter plate (adjustment jig LDD-V-JIG can not be used for depth adjustment).
①Loosen the depth adjustment screws.
②Align the centre of the counter plate shaft with that of the door thickness.
③Tighten the depth adjustment screws.
Spec Table
Body
| Image | Item Name | Item Code | Quotation |
|---|---|---|---|
|
LDD-V-L-JIG | 270-025-275 |

|
|
LDD-V-R-JIG | 270-025-276 |
|
| Image | Item Name | Item Code | Quotation | RoHS | Spec | Type | Material | Colour | EAN |
|---|---|---|---|---|---|---|---|---|---|
|
|
LDD-V-L-JIG |
270-025-275 |
|

|
Left-handed |
Other |
ABS |
Orange |
4510932134675 |
|
|
LDD-V-R-JIG |
270-025-276 |
|
|
Right-handed |
Other |
ABS |
Orange |
4510932134682 |
Slide to See More
CAD download
Catalogue

Related products
Category
Your Recently Viewed Items
You have no recently viewed products.
If you would like to keep track of items viewed, click on the "Keep History" button below.
You have no recently viewed products.
-All items, unless specified, are made to exact metric dimensions.
-Changes in dimensions, finishes, and packing etc. or suspension of production may occur without notice.
-Our liability is limited to the replacement of the merchandise.

 Loading